IBM P70 Portable
…link to more information, Wikipedia has entry for P75 but not P70…
Computers in Collection
IBM P70 portable, serial unknown
Inventory
Case
| Attribute | Value |
|---|---|
| Name | IBM Personal System/2 |
| Manufacturer | IBM |
| Type/Model | 8573-121 |
| Part | 65X1580 |
| Serial | 23-1052362 |
| Manufacture Date | “90/04” |
| Manufactured In | USA |
| Input | 100-125V AC, 2.4A, single-phase, 50-60Hz, 0.2kVA or 200-240V AC, 1.2A, single-phase, 50-60Hz, 0.2kVA |
| Source | 2021/Jan/16, Sean@CCC |
Serial is found on the front of the unit, on the same surface but opposite side from the power switch.
Keyboard
TODO:
CMOS Battery
| Attribute | Value |
|---|---|
| Name | Lithium Battery |
| Manufacturer | Panasonic |
| Model | BR-P2 |
| IBM Part | 72X8498 |
| Voltage | 6 |
| Markings | “013”, “62X0338” |
| Datasheet | Panasonic BR-P2 datasheet |
| Notes | Original was removed, measured at 2V and falling. |
| Source | 2021/Jan/16, Sean@CCC |
System Board
| Attribute | Value |
|---|---|
| Name | System Board |
| Manufacturer | IBM |
| Part | TODO: 65X1564? Depends on serial number, which I can’t find!!! |
| Serial | TODO: |
| Processor | Intel 80386 |
| Clock Speed | TODO: 20 MHz? |
| Source | 2021/Jan/16, Sean@CCC |
Internal Floppy Drive
TODO:
| Attribute | Value |
|---|---|
| Capacity | 2.88MB (according to eject button text) |
| Source | 2021/Jan/16, Sean@CCC |
Internal Hard Drive
TODO:
| Attribute | Value |
|---|---|
| Source | 2021/Jan/16, Sean@CCC |
Video Card
TODO:
| Attribute | Value |
|---|---|
| Source | 2021/Jan/16, Sean@CCC |
Power Supply
TODO:
| Attribute | Value |
|---|---|
| Source | 2021/Jan/16, Sean@CCC |
Maintenance Log
Hex nuts for the rear D-sub ports can be removed with a 3/16” hex driver.
Missing a couple of “planar” board screws. One would be retaining a ground lug and wire…
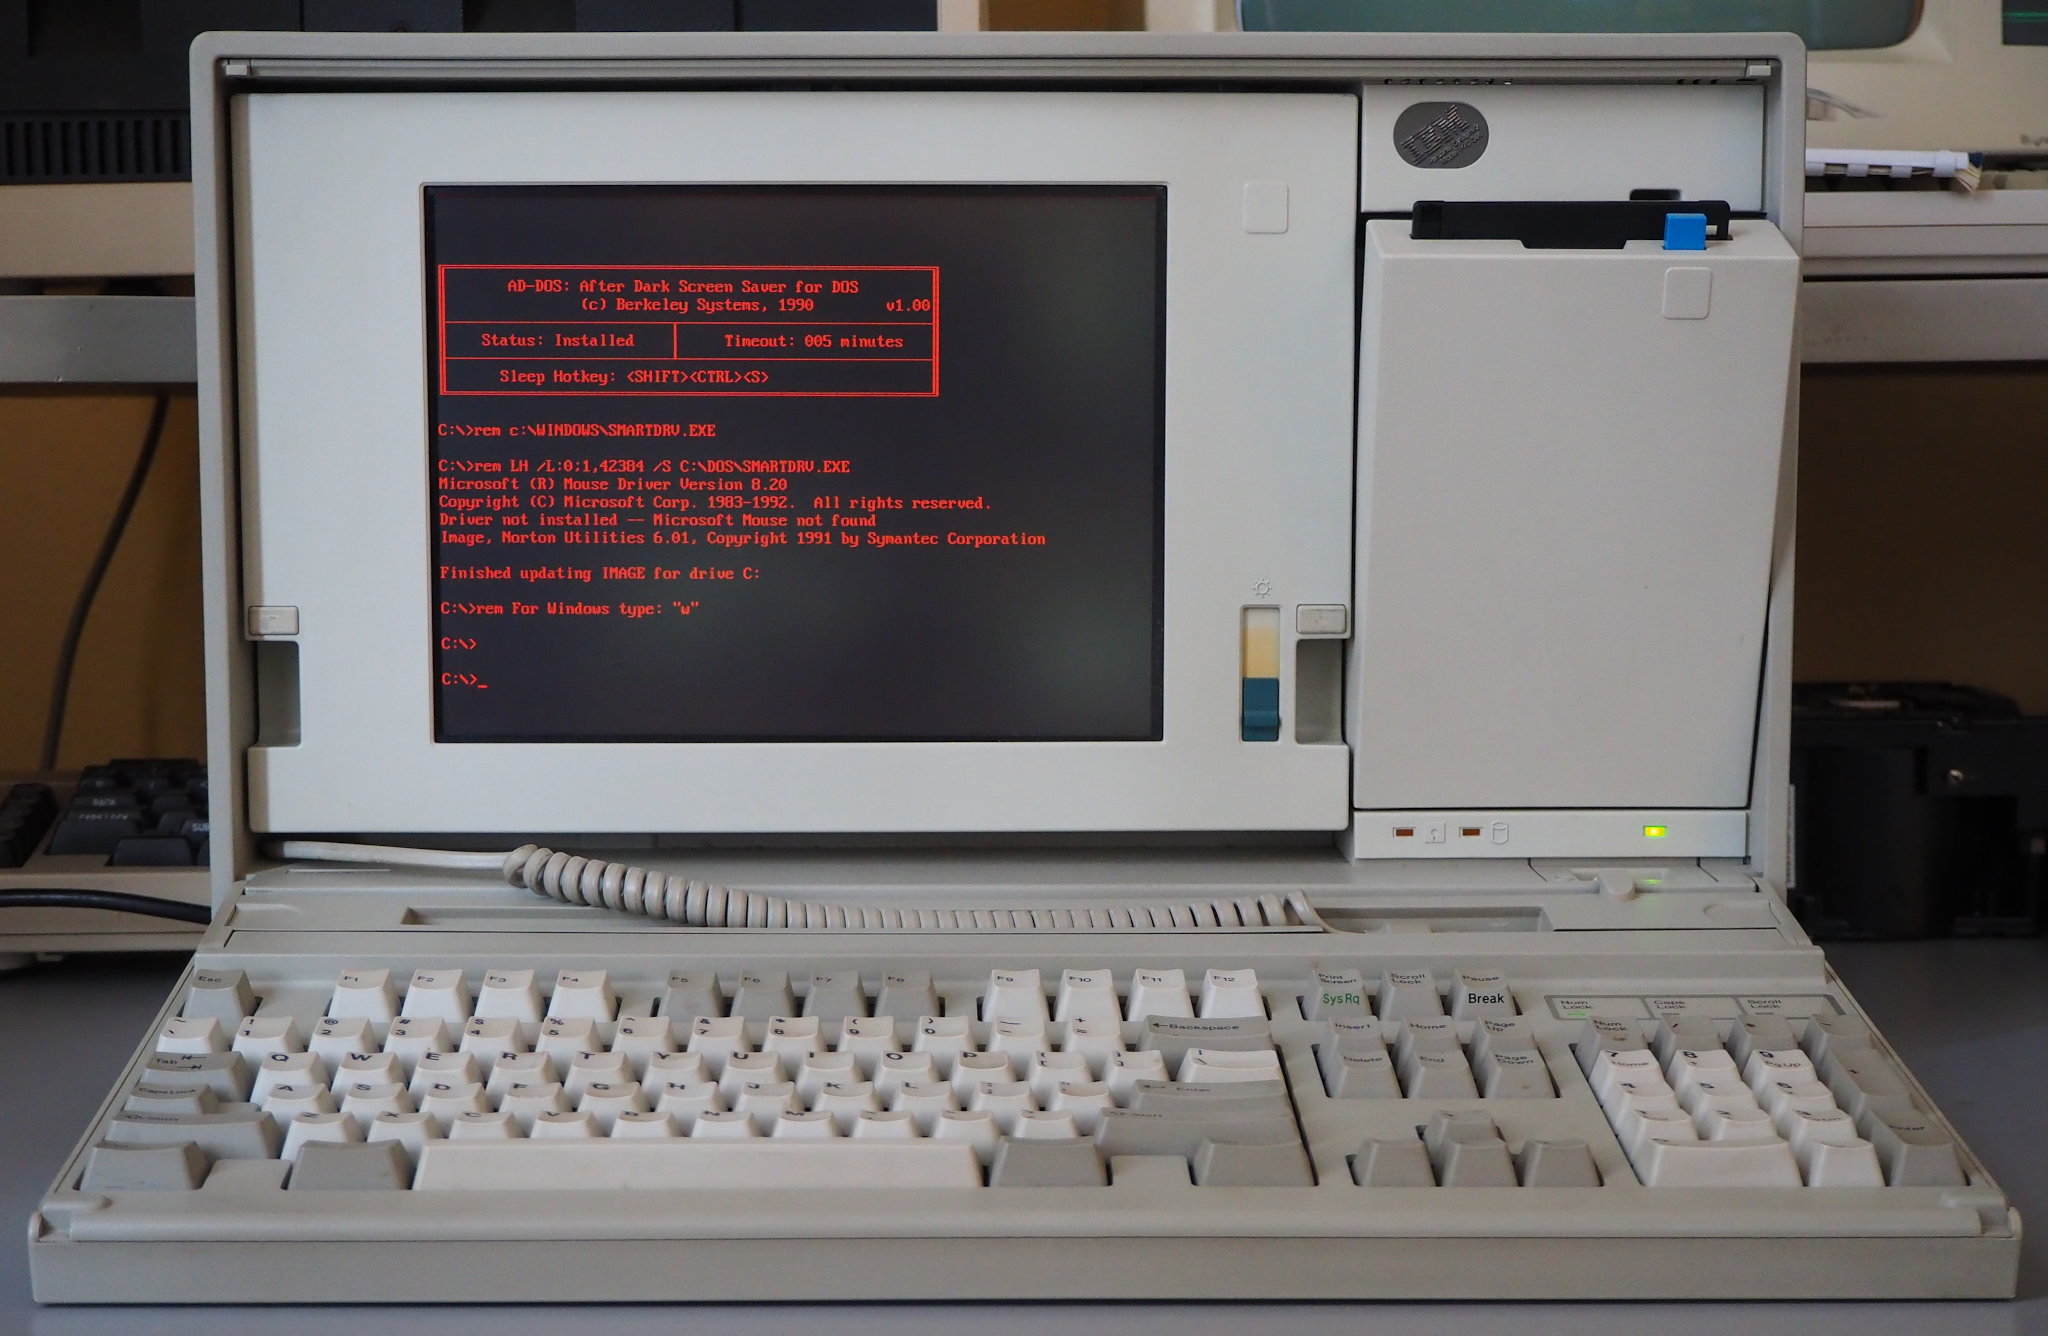
Removed the BIOS CMOS battery. The computer really doesn’t like forgetting its settings, so much so that the display may not light and you’ll think it’s broken (but the machine will still beep). Be patient, eventually (maybe with the correct keystrokes) you can get the machine to boot from the reference disk.
TODO: There’s a couple of leftover bits after my first reassembly. A crown washer and a plastic pull tab thing.
TODO: Characterize the missing screws, order new ones. I bet there’s IBM documentation that describes these screws in excruciating detail! In the service manual, an FRU is given for a set of screws with kinda vague descriptions…
TODO: Characterize CMOS battery, find replacement. Rumor has it it’s an old video camera style battery of some sort, and may be available from camera battery retailers.
TODO: Is it reasonable to think I could find a ‘387 for this thing?
TODO: Image the ESDI hard drive before it dies? And/or develop a “solid-state” replacement?
TODO: Apparently some earlier P70 386 computers have issues with the plasma display failing and needing replacement. The criteria in the service manual are complicated. “See ECA 014”.
AUTOEXEC.BAT has bits in it that load a Cyrix 486 driver, and had QL2FAX installed at some point. The directories for Duke Nukem games are all empty, and the drives are DoubleSpaced. I’m guessing they got hard-up for space…
2021/Mar/11
Powered up the system to try out a new MCA modem card. The same old behavior occured, where the internal gas plasma display would not light, but otherwise, the system seemed to be functioning. I haven’t replaced the CMOS battery, so there’s lots of beeping during boot-up time, and I can hear the reference disk loading. I decided to try an old VGA monitor connected to the external display port on the system. I did get video and the plasma came to life too! That’s weird. Later on, the display (both internal and external) stopped working. This suggests there’s stil some mechanical or thermal issue. So I took the system apart, pulling out the logic and video boards, and then the power supply. There was nothing obviously wrong. I also pulled the display out of the cavity and had a look. Again, nothing obviously wrong. Eventually, I took an interest in a cable with a large wad of unshrunk heat shrink tie-wrapped over it, located near the power supply. That is the power supply for the display. And since the display sometimes acts like it has no power… Maybe this is the problem? I removed the tie-wraps, disconnected the connector, and removed the heat-shrink. I noticed on the supply end of the connector, the yellow wire’s contact inside the connector was loose and not seated all the way in. So I pulled the yellow contact out, stretched the retaining tines on the contact a bit, and re-inserted it. Reassembled everything, and so far, so good – the display is reliable! Fingers crossed that was the problem, because otherwise I’m all out of ideas…
By the way, when removing the power supply block from the back of the computer, note that the power switch comes with, and if you don’t have the keyboard either folded down or completely detached, the power supply will get stuck and not want to come out. There’s a little lug on the keyboard whose primary purpose is to push the power switch “off” when you fold up the keyboard. But it also blocks the power supply being removed or inserted.
Another thing to note when removing the power supply: one of the screws in the feet on the bottom of the computer drives into the power supply. You need to remove that. The diagram in the service manual suggests there’s a screw in the bottom of the case toward the middle, but I couldn’t find that one, only one (not noted in the manual) at the corner.
Also, when reinstalling items inside the back of the unit, be vigilant of all the cables and spade lugs around the periphery. Don’t pinch them or lose track of them completely.
2021/Mar/17
The hard drive was removed and the cabling and connectors examined and measured.
2021/Mar/19
CMOS battery replaced! I ordered a Panasonic CR-P2, which fit perfectly and is available from Digi-Key and Mouser.